In this exercise, you will integrate ONOS built-in services for link and host discovery with your P4 program. Such built-in services are based on the ability of switches to send data plane packets to the controller (packet-in) and vice versa (packet-out).
To make this work with your P4 program, you will need to apply simple changes to the starter P4 code, validate the P4 changes using PTF-based data plane unit tests, and finally, apply changes to the pipeconf Java implementation to enable ONOS’s built-in apps to use packet-in/out via P4Runtime.
The exercise has two parts:
- Enable packet I/O and verify link discovery
- Host discovery & L2 bridging
Part 1: Enable packet I/O and verify link discovery
We start by reviewing how controller packet I/O works with P4Runtime.
Background: Controller packet I/O with P4Runtime
The P4 program under p4src/main.p4 provides support for
carrying arbitrary metadata in P4Runtime PacketIn and PacketOut messages.
Two special headers are defined and annotated with the standard P4 annotation
@controller_header:
@controller_header("packet_in")
header cpu_in_header_t {
    port_num_t ingress_port;
    bit<7> _pad;
}

@controller_header("packet_out")
header cpu_out_header_t {
    port_num_t egress_port;
    bit<7> _pad;
}
These headers are used to carry the original switch ingress port of a packet-in, and to specify the intended output port for a packet-out.
When the P4Runtime agent in Stratum receives a packet from the switch CPU port,
it expects to find the cpu_in_header_t header as the first one in the frame.
Indeed, it looks at the controller_packet_metadata part of the P4Info file to
determine the number of bits to strip at the beginning of the frame and to
populate the corresponding metadata field of the PacketIn message, including
the ingress port as in this case.
Similarly, when Stratum receives a P4Runtime PacketOut message, it uses the
values found in the PacketOut’s metadata fields to serialize and prepend a
cpu_out_header_t to the frame before feeding it to the pipeline parser.
1. Modify P4 program
The P4 starter code already provides support for the following capabilities:
- Parse the
cpu_outheader (if the ingress port is the CPU one) - Emit the
cpu_inheader as the first one in the deparser - Provide an ACL table with ternary match fields and an action to send or clone packets to the CPU port (used to generate a packet-ins)
Something is missing to provide complete packet-in/out support, and you have to modify the P4 program to implement it:
- Open
p4src/main.p4; - Modify the code where requested (look for
TODO EXERCISE 4); - Compile the modified P4 program using the
make p4-buildcommand. Make sure to address any compiler errors before continuing.
At this point, our P4 pipeline should be ready for testing.
2. Run PTF tests
Before starting ONOS, let’s make sure the P4 changes work as expected by running some PTF tests. But first, you need to apply a few simple changes to the test case implementation.
Open file ptf/tests/packetio.py and modify wherever requested (look for TODO
EXERCISE 4). This test file provides two test cases: one for packet-in and
one for packet-out. In both test cases, you will have to modify the implementation to
use the same name for P4Runtime entities as specified in the P4Info file
obtained after compiling the P4 program (p4src/build/p4info.txt).
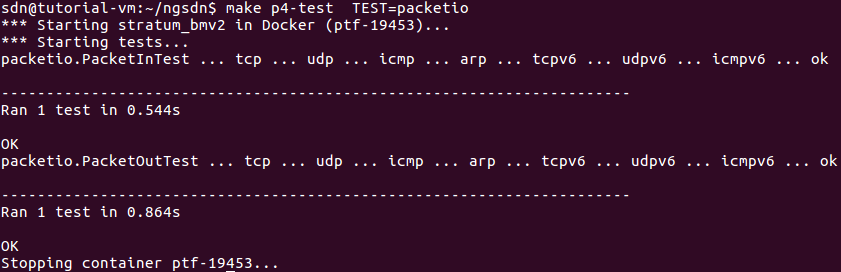
To run all the tests for this exercise:
make p4-test TEST=packetio
This command will run all tests in the packetio group (i.e. the content of
ptf/tests/packetio.py). To run a specific test case you can use:
make p4-test TEST=<PYTHON MODULE>.<TEST CLASS NAME>
For example:
make p4-test TEST=packetio.PacketOutTest
Check for regressions
To make sures the new changes are not breaking other features, make sure to run tests for L2 bridging support.
make p4-test TEST=bridging
If all tests succeed, congratulations! You can move to the next step.
How to debug failing tests?
When running PTF tests, multiple files are produced that you can use to spot bugs:
ptf/stratum_bmv2.log: BMv2 log with trace level (showing tables matched and other info for each packet)ptf/p4rt_write.log: Log of all P4Runtime Write requestsptf/ptf.pcap: PCAP file with all packets sent and received during tests (the tutorial VM comes with Wireshark for easier visualization)ptf/ptf.log: PTF log of all packet operations (sent and received)
3. Modify ONOS pipeline interpreter
The PipelineInterpreter is the ONOS driver behavior used to map the ONOS
representation of packet-in/out to one that is consistent with your P4
pipeline (along with other similar mappings).
Specifically, to use services like link and host discovery, ONOS built-in apps need to be able to set the output port of a packet-out and access the original ingress port of a packet-in.
In the following, you will be asked to apply a few simple changes to the
PipelineInterpreter implementation:
-
Open file:
app/src/main/java/org/onosproject/ngsdn/tutorial/pipeconf/InterpreterImpl.java -
Modify wherever requested (look for
TODO EXERCISE 4), specifically:-
Look for a method named
buildPacketOut, modify the implementation to use the same name of the egress port metadata field for thepacket_outheader as specified in the P4Info file. -
Look for method
mapInboundPacket, modify the implementation to use the same name of the ingress port metadata field for thepacket_inheader as specified in the P4Info file.
-
-
Build ONOS app (including the pipeconf) with the command
make app-build.
The P4 compiler outputs (bmv2.json and p4info.txt) are copied in the app
resource folder (app/src/main/resources) and will be included in the ONOS app
binary. The copy that gets included in the ONOS app will be the one that gets
deployed by ONOS to the device after the connection is initiated.
4. Restart ONOS
Note: ONOS should be already running, and in theory, there should be no need
to restart it. However, while ONOS supports reloading the pipeconf with a
modified one (e.g., with updated bmv2.json and p4info.txt), the version of
ONOS used in this tutorial (2.2.0, the most recent at the time of writing) does
not support reloading the pipeconf behavior classes, in which case the old
classes will still be used. For this reason, to reload a modified version of
InterpreterImpl.java, you need to kill ONOS first.
In a terminal window, type:
$ make restart
This command will restart all containers, removing any state from previous executions, including ONOS.
Wait approximately 20 seconds for ONOS to completing booting, or check
the ONOS log (make onos-log) until no more messages are shown.
5. Load updated app and register pipeconf
On a terminal window, type:
$ make app-reload
This command will upload to ONOS and activate the app binary previously built (located at app/target/ngsdn-tutorial-1.0-SNAPSHOT.oar).
6. Push netcfg to ONOS to trigger device and link discovery
On a terminal window, type:
$ make netcfg
Use the ONOS CLI to verify that all devices have been discovered:
onos> devices -s
id=device:leaf1, available=true, role=MASTER, type=SWITCH, driver=stratum-bmv2:org.onosproject.ngsdn-tutorial
id=device:leaf2, available=true, role=MASTER, type=SWITCH, driver=stratum-bmv2:org.onosproject.ngsdn-tutorial
id=device:spine1, available=true, role=MASTER, type=SWITCH, driver=stratum-bmv2:org.onosproject.ngsdn-tutorial
id=device:spine2, available=true, role=MASTER, type=SWITCH, driver=stratum-bmv2:org.onosproject.ngsdn-tutorial
Verify that all links have been discovered. You should see 8 links in total, each one representing a direction of the 4 bidirectional links of our Mininet topology:
onos> links
src=device:leaf1/1, dst=device:spine1/1, type=DIRECT, state=ACTIVE, expected=false
src=device:leaf1/2, dst=device:spine2/1, type=DIRECT, state=ACTIVE, expected=false
src=device:leaf2/1, dst=device:spine1/2, type=DIRECT, state=ACTIVE, expected=false
src=device:leaf2/2, dst=device:spine2/2, type=DIRECT, state=ACTIVE, expected=false
src=device:spine1/1, dst=device:leaf1/1, type=DIRECT, state=ACTIVE, expected=false
src=device:spine1/2, dst=device:leaf2/1, type=DIRECT, state=ACTIVE, expected=false
src=device:spine2/1, dst=device:leaf1/2, type=DIRECT, state=ACTIVE, expected=false
src=device:spine2/2, dst=device:leaf2/2, type=DIRECT, state=ACTIVE, expected=false
If you don’t see a link, check the ONOS log (make onos-log) for any
errors with packet-in/out handling. In case of errors, it’s possible that you
have not modified InterpreterImpl.java correctly. In this case, go back to
step 3.
You should see 5 flow rules for each device. For example,
to show all flow rules installed so far on device leaf1:
onos> flows -s any device:leaf1
deviceId=device:leaf1, flowRuleCount=5
    ADDED, ..., table=IngressPipeImpl.acl_table, priority=40000, selector=[ETH_TYPE:lldp], treatment=[immediate=[IngressPipeImpl.clone_to_cpu()]]
    ADDED, ..., table=IngressPipeImpl.acl_table, priority=40000, selector=[ETH_TYPE:bddp], treatment=[immediate=[IngressPipeImpl.clone_to_cpu()]]
    ADDED, ..., table=IngressPipeImpl.acl_table, priority=40000, selector=[ETH_TYPE:arp], treatment=[immediate=[IngressPipeImpl.clone_to_cpu()]]
    ADDED, ..., table=IngressPipeImpl.acl_table, priority=40000, selector=[ETH_TYPE:ipv6, IP_PROTO:58, ICMPV6_TYPE:136], treatment=[immediate=[IngressPipeImpl.clone_to_cpu()]]
    ADDED, ..., table=IngressPipeImpl.acl_table, priority=40000, selector=[ETH_TYPE:ipv6, IP_PROTO:58, ICMPV6_TYPE:135], treatment=[immediate=[IngressPipeImpl.clone_to_cpu()]]
    ...
These flow rules are the result of the translation of flow objectives generated
by the hostprovider and lldpprovider built-in apps.
Flow objectives are translated by the pipeconf, which provides a Pipeliner
behavior implementation (PipelinerImpl.java). These flow
rules specify a match key by using ONOS standard/known header fields, such as
ETH_TYPE, ICMPV6_TYPE, etc. These types are mapped to P4Info-specific match
fields by the pipeline interpreter
(InterpreterImpl.java; look for method
mapCriterionType)
The hostprovider app provides host discovery capabilities by intercepting ARP
(selector=[ETH_TYPE:arp]) and NDP packets (selector=[ETH_TYPE:ipv6,
IP_PROTO:58, ICMPV6_TYPE:...]), which are cloned to the controller
(treatment=[immediate=[IngressPipeImpl.clone_to_cpu()]]). Similarly,
lldpprovider generates flow objectives to intercept LLDP and BBDP packets
(selector=[ETH_TYPE:lldp] and selector=[ETH_TYPE:bbdp] ) periodically
emitted on all devices’ ports as P4Runtime packet-outs, allowing automatic link
discovery.
All flow rules refer to P4 action clone_to_cpu(), which invokes a
v1model-specific primitive to set the clone session ID:
action clone_to_cpu() {
    clone3(CloneType.I2E, CPU_CLONE_SESSION_ID, ...);
}
To actually generate P4Runtime packet-in messages for matched packets, the
pipeconf’s pipeliner generates a CLONE group, internally translated into a
P4RuntimeCloneSessionEntry, that maps CPU_CLONE_SESSION_ID to a set of
ports, just the CPU one in this case.
To show all groups installed in ONOS, you can use the groups command. For
example, to show groups on leaf1:
onos> groups any device:leaf1
deviceId=device:leaf1, groupCount=1
   id=0x63, state=ADDED, type=CLONE, ..., appId=org.onosproject.core, referenceCount=0
       id=0x63, bucket=1, ..., weight=-1, actions=[OUTPUT:CONTROLLER]
7. Visualize links on the ONOS UI
Using the ONF Cloud Tutorial Portal, access the ONOS UI. If you are running the VM on your laptop, open up a browser (e.g. Firefox) to http://127.0.0.1:8181/onos/ui.
On the same page where the ONOS topology view is shown:
- Press
Lto show device labels; - Press
Amultiple times until you see link stats, in either packets/seconds (pps) or bits/seconds.
Link stats are derived by ONOS by periodically obtaining the port counters for each device. ONOS internally uses gNMI to read port information, including counters.
In this case, you should see approximately 1 packet/s, as that’s the rate of
packet-outs generated by the lldpprovider app.
Part 2: Host discovery & L2 bridging
By fixing packet I/O support in the pipeline interpreter we did not only get
link discovery, but also enabled the built-in hostprovider app to perform
host discovery. This service is required by our tutorial app to populate
the bridging tables of our P4 pipeline, to forward packets based on the
Ethernet destination address.
Indeed, the hostprovider app works by snooping incoming ARP/NDP packets on the
switch and deducing where a host is connected to from the packet-in message
metadata. Other apps in ONOS, like our tutorial app, can then listen for
host-related events and access information about their addresses (IP, MAC) and
location.
In the following, you will be asked to enable the app’s L2BridgingComponent,
and to verify that host discovery works by pinging hosts on Mininet. But before,
it’s useful to review how the starter code implements L2 bridging.
Background: Our implementation of L2 bridging
To make things easier, the starter code assumes that hosts of a given subnet are all connected to the same leaf, and two interfaces of two different leaves cannot be configured with the same IPv6 subnet. In other words, L2 bridging is allowed only for hosts connected to the same leaf.
The Mininet script topo-v6.py used in this tutorial defines 4 subnets:
2001:1:1::/64with 3 hosts connected toleaf1(h1a,h1b, andh1c)2001:1:2::/64with 1 hosts connected toleaf1(h2)2001:2:3::/64with 1 hosts connected toleaf2(h3)2001:2:4::/64with 1 hosts connected toleaf2(h4)
The same IPv6 prefixes are defined in the netcfg.json file and are used to provide interface configuration to ONOS.
Data plane
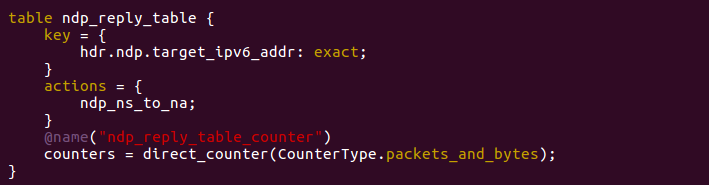
The P4 code defines tables to forward packets based on the Ethernet address, precisely, two distinct tables, to handle two different types of L2 entries:
- Unicast entries: which will be filled in by the control plane when the location (port) of new hosts is learned.
- Broadcast/multicast entries: used replicate NDP Neighbor Solicitation (NS) messages to all host-facing ports;
For (2), unlike ARP messages in IPv4, which are broadcasted to Ethernet
destination address FF:FF:FF:FF:FF:FF, NDP messages are sent to special Ethernet
addresses specified by RFC2464. These addresses are prefixed with 33:33 and the
last four octets are the last four octets of the IPv6 destination multicast
address. The most straightforward way of matching on such IPv6
broadcast/multicast packets, without digging in the details of RFC2464, is to
use a ternary match on 33:33:**:**:**:**, where * means “don’t care”.
For this reason, our solution defines two tables. One that matches in an exact
fashion l2_exact_table (easier to scale on switch ASIC memory) and one that
uses ternary matching l2_ternary_table (which requires more expensive TCAM
memories, usually much smaller).
These tables are applied to packets in an order defined in the apply block
of the ingress pipeline (IngressPipeImpl):
if (!l2_exact_table.apply().hit) {
    l2_ternary_table.apply();
}
The ternary table has lower priority, and it’s applied only if a matching entry is not found in the exact one.
Note: we won’t be using VLANs to segment our L2 domains. As such, when
matching packets in the l2_ternary_table, these will be broadcasted to ALL
host-facing ports.
Control plane (L2BridgingComponent)
We already provide an ONOS app component controlling the L2 bridging tables of the P4 program: L2BridgingComponent.java
This app component defines two event listeners located at the bottom of the
L2BridgingComponent class, InternalDeviceListener for device events (e.g.
connection of a new switch) and InternalHostListener for host events (e.g. new
host discovered). These listeners in turn call methods like:
-
setUpDevice(): responsible for creating multicast groups for all host-facing ports and inserting flow rules for thel2_ternary_tablepointing to such groups. -
learnHost(): responsible for inserting unicast L2 entries based on the discovered host location.
To support reloading the app implementation, these methods are also called at
component activation for all devices and hosts known by ONOS at the time of
activation (look for methods activate() and setUpAllDevices()).
To keep things simple, our broadcast domain will be restricted to a single
device, i.e. we allow packet replication only for ports of the same leaf switch.
As such, we can exclude ports going to the spines from the multicast group. To
determine whether a port is expected to be facing hosts or not, we look at the
interface configuration in netcfg.json file (look for the
ports section of the JSON file).
1. Enable L2BridgingComponent and reload the app
Before starting, you need to enable the app’s L2BridgingComponent, which is currently disabled.
-
Open file:
app/src/main/java/org/onosproject/ngsdn/tutorial/L2BridgingComponent.java -
Look for the class definition at the top and enable the component by setting the
enabledflag totrue@Component( immediate = true, enabled = true ) public class L2BridgingComponent { -
Build the ONOS app with
make app-build -
Re-load the app to apply the changes with
make app-reload
After reloading the app, you should see the following messages in the ONOS log
(make onos-log):
INFO  [L2BridgingComponent] Started
...
INFO  [L2BridgingComponent] *** L2 BRIDGING - Starting initial set up for device:leaf1...
INFO  [L2BridgingComponent] Adding L2 multicast group with 4 ports on device:leaf1...
INFO  [L2BridgingComponent] Adding L2 multicast rules on device:leaf1...
...
INFO  [L2BridgingComponent] *** L2 BRIDGING - Starting initial set up for device:leaf2...
INFO  [L2BridgingComponent] Adding L2 multicast group with 2 ports on device:leaf2...
INFO  [L2BridgingComponent] Adding L2 multicast rules on device:leaf2...
...
2. Examine flow rules and groups
Check the ONOS flow rules, you should see 2 new flow rules for the
l2_ternary_table installed by L2BridgingComponent. For example, to show
all flow rules installed so far on device leaf1:
onos> flows -s any device:leaf1
deviceId=device:leaf1, flowRuleCount=...
    ...
    ADDED, ..., table=IngressPipeImpl.l2_ternary_table, priority=10, selector=[hdr.ethernet.dst_addr=0x333300000000&&&0xffff00000000], treatment=[immediate=[IngressPipeImpl.set_multicast_group(gid=0xff)]]
    ADDED, ..., table=IngressPipeImpl.l2_ternary_table, priority=10, selector=[hdr.ethernet.dst_addr=0xffffffffffff&&&0xffffffffffff], treatment=[immediate=[IngressPipeImpl.set_multicast_group(gid=0xff)]]
    ...
To show also the multicast groups, you can use the groups command. For example
to show groups on leaf1:
onos> groups any device:leaf1
deviceId=device:leaf1, groupCount=2
   id=0x63, state=ADDED, type=CLONE, ..., appId=org.onosproject.core, referenceCount=0
       id=0x63, bucket=1, ..., weight=-1, actions=[OUTPUT:CONTROLLER]
   id=0xff, state=ADDED, type=ALL, ..., appId=org.onosproject.ngsdn-tutorial, referenceCount=0
       id=0xff, bucket=1, ..., weight=-1, actions=[OUTPUT:3]
       id=0xff, bucket=2, ..., weight=-1, actions=[OUTPUT:4]
       id=0xff, bucket=3, ..., weight=-1, actions=[OUTPUT:5]
       id=0xff, bucket=4, ..., weight=-1, actions=[OUTPUT:6]
The ALL group is a new one, created by our app (appId=org.onosproject.ngsdn-tutorial).
Groups of type ALL in ONOS map to P4Runtime MulticastGroupEntry, in this
case used to broadcast NDP NS packets to all host-facing ports.
3. Test L2 bridging on Mininet
To verify that L2 bridging works as intended, send a ping between hosts in the same subnet:
mininet> h1a ping h1b
PING 2001:1:1::b(2001:1:1::b) 56 data bytes
64 bytes from 2001:1:1::b: icmp_seq=2 ttl=64 time=0.580 ms
64 bytes from 2001:1:1::b: icmp_seq=3 ttl=64 time=0.483 ms
64 bytes from 2001:1:1::b: icmp_seq=4 ttl=64 time=0.484 ms
...
In contrast to Exercise 1, here we have NOT set any NDP static entries.
Instead, NDP NS and NA packets are handled by the data plane thanks to the ALL
group and l2_ternary_table’s flow rule described above. Moreover, given the
ACL flow rules to clone NDP packets to the controller, hosts can be discovered
by ONOS. Host discovery events are used by L2BridgingComponent.java to insert
entries in the P4 l2_exact_table. Check the ONOS log, you should see messages
related to the discovery of hosts h1a and h1b:
INFO  [L2BridgingComponent] HOST_ADDED event! host=00:00:00:00:00:1A/None, deviceId=device:leaf1, port=3
INFO  [L2BridgingComponent] Adding L2 unicast rule on device:leaf1 for host 00:00:00:00:00:1A/None (port 3)...
INFO  [L2BridgingComponent] HOST_ADDED event! host=00:00:00:00:00:1B/None, deviceId=device:leaf1, port=4
INFO  [L2BridgingComponent] Adding L2 unicast rule on device:leaf1 for host 00:00:00:00:00:1B/None (port 4).
4. Visualize hosts on the ONOS CLI and web UI
You should see exactly two hosts in the ONOS CLI (make onos-cli):
onos> hosts -s
id=00:00:00:00:00:1A/None, mac=00:00:00:00:00:1A, locations=[device:leaf1/3], vlan=None, ip(s)=[2001:1:1::a]
id=00:00:00:00:00:1B/None, mac=00:00:00:00:00:1B, locations=[device:leaf1/4], vlan=None, ip(s)=[2001:1:1::b]
Using the ONF Cloud Tutorial Portal, access the ONOS UI. If you are running the VM on your laptop, open up a browser (e.g. Firefox) to http://127.0.0.1:8181/onos/ui.
